Blending and changing variations in-game/at runtime
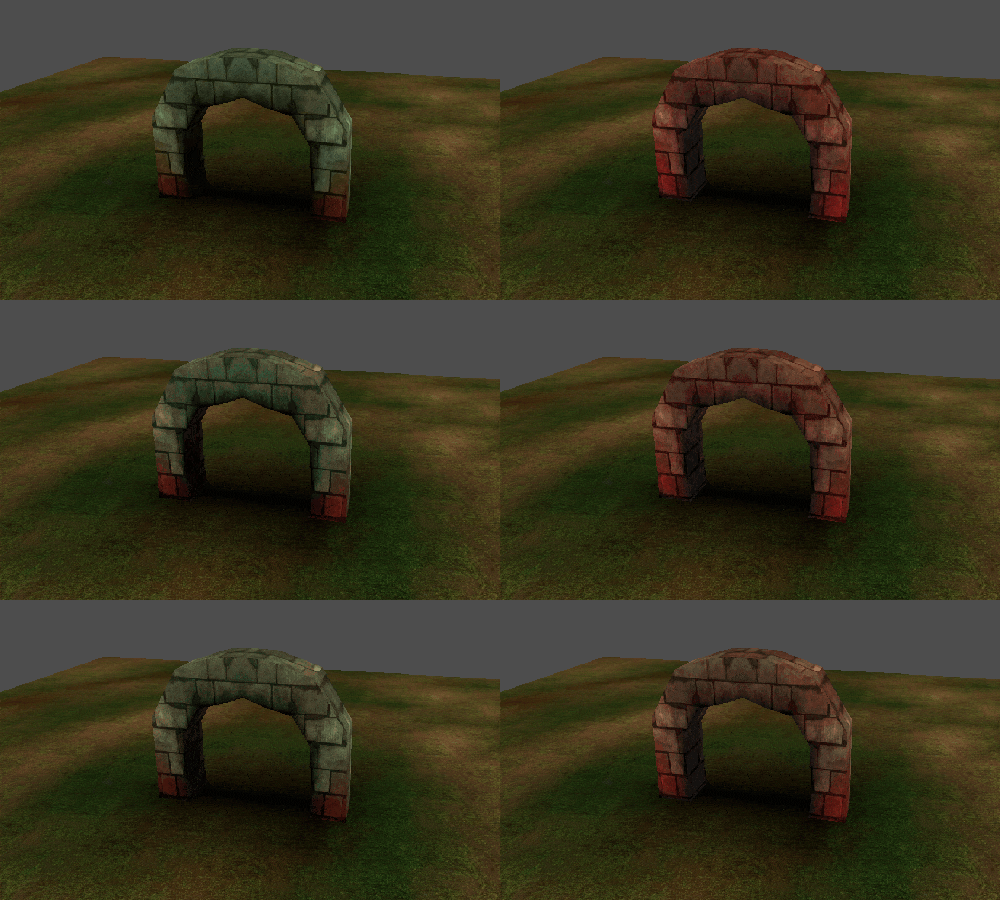
Using the VSRuntime Node and API from Vertex Studio Pro, you can switch to another variation of a mesh or blend/tween between variations of a mesh at runtime. This is useful for creating dynamic effects in your game or simply using or switching between different variations of the same mesh, non-destructively.
Important
Variations are a snapshot of everything related to a mesh in Vertex Studio at the time the Variation is saved. The variation includes the vertex colors, vertex topology (positions, normals, tangents), selections active in Vertex Studio and sets of vertex groups that you created(if any).
When you switch to another variation (or snapshot as they are called internally), all these changes are applied and the mesh changes to everything that is in the snapshot.
So are not only blending between vertex colors (which is already quite powerful and pretty cool), but if you optionally have different normals in different variation files for that mesh (for example, if you used the Paint Normals brush), you are also going to blend between different normals, creating truly different looks for the same mesh.
Note
This tutorial requires Vertex Studio Pro ⭐.
Sample project
Download the sample project and sample code from GitHub. Extract the zip file and open the project in Godot.
Files relevant to this tutorial are in the folder Advanced/RuntimeBlending.
Note
Although the files downloaded here contain the same files as the Quickstart Tutorial files, this new zip is different because it comes from another Git branch, containing a new folder (Advanced/RuntimeBlending).
Tip
It’s recommended that you finish the Quickstart Tutorial before doing this tutorial.
Setup
A mesh edited with Vertex Studio must have multiple
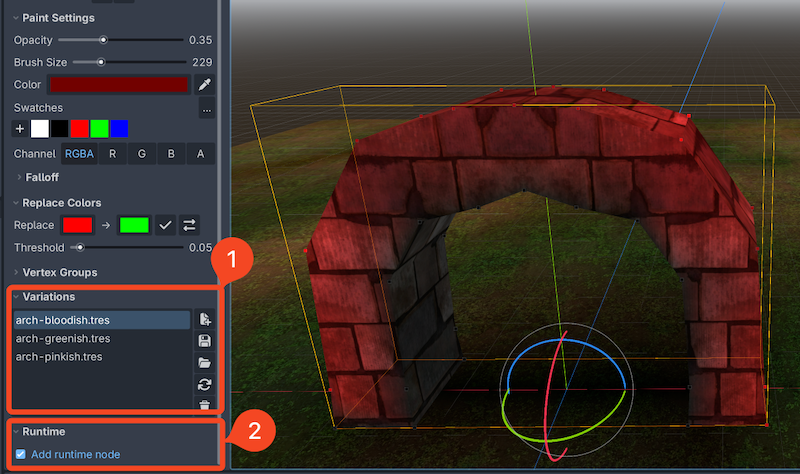
Variations. See Non-destructive workflow with Variations (PRO ONLY) from the quickstart tutorial in order to learn how to create variations.The
VSRuntimenode must be added to theMeshInstance3Dnode with variations. For that, clickAdd runtime nodein theRuntimesection.
If you open the Game scene from the sample files (inside Advanced/RuntimeBlending), click the Archway node in the Scene Tree, open Vertex Studio and scroll down to Variations to see the variations included. Double-click a variation in order to activate and preview it.
Changing variations in the Inspector
You can change the variation of a MeshInstance3D that has the VSRuntime node from the Inspector by clicking the Variation dropdown and selecting a different variation. In order for it to be accessible, since the Archway is an instanced scene, Editable Children must be enabled.
This is useful for non-destructively having different versions of the same mesh, for example, when building levels or environments.
This has already been explained in detail in Non-destructive workflow with Variations (PRO ONLY), but let’s see it here again with the new sample files:
Changing variations at runtime via code
VSRuntime has a public API with two ways to change the variation of a MeshInstance3D at runtime instantly (no blending nor tweening involved):
runtime.set_active_snapshot(variation_resource_path)runtime.variation = variation_index: variation index (int) is the same as theMeshInstance3DVSRuntimenodeVariationproperty in the Inspector.
Examples:
runtime.set_active_snapshot("res://Variations/arch-greenish.tres")

# or...
runtime.variation = 2
Blending / tweening between variations at runtime
To blend / tween between variations at runtime, VSRuntime provides a public API with methods for GPU and CPU blending.
GPU blending: faster, but uses two custom shaders (lit or unlit), and your mesh cannot have a custom shader, as it’s going to be overriden by the custom shader while it’s blending.
CPU blending: slower, but your mesh can have a custom shader.
Warning
Blending/tweening variations at runtime can cause performance issues.
Changing to a variation directly and instantly (even at runtime, as shown above) is much faster and more efficient (and it’s production ready).
GPU blending
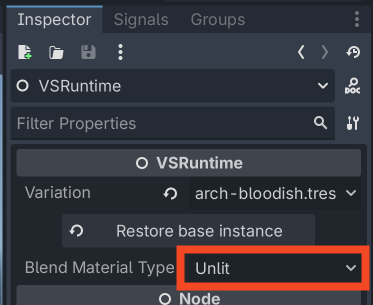
When using GPU blending, you must choose the blend material type that you want to use: Unlit or Lit (Unlit by default). Select the VSRuntime node of the mesh to be blended and in the Inspector, select the material type in the Blend Material Type dropdown.
API:
@signal snapshot_blend_finished(to_path: String)
func tween_snapshots(from_path: String, to_path: String, duration: float = 1.0) -> bool
func tween_to_snapshot(to_path: String, duration: float = 1.0) -> bool
func stop_snapshot_blend() -> void
Example:
# Signal to know when the blending is finished
runtime.snapshot_blend_finished.connect(_on_snapshot_blend_finished)

# Blend to the snapshot "res://Variations/arch-bloodish.tres" in 1 second
runtime.tween_to_snapshot("res://Variations/arch-bloodish.tres", 1.0)

func _on_snapshot_blend_finished(reached_path: String):
    # Determine the next snapshot to blend to
    if reached_path == "res://Variations/arch-bloodish.tres":
        to_path = "res://Variations/arch-greenish.tres"
    else:
        to_path = "res://Variations/arch-bloodish.tres"

    # Blend to the next snapshot
    runtime.tween_to_snapshot(to_path, 1.0)
CPU blending
When using CPU blending, your mesh can have a custom shader and there’s no shader overriden by VSRuntime.
The code is the same as GPU blending, except that the methods are appended with _cpu:
@signal snapshot_blend_finished(to_path: String) # same signal as GPU blending
func tween_snapshots_cpu(from_path: String, to_path: String, duration: float = 1.0) -> bool
func tween_to_snapshot_cpu(to_path: String, duration: float = 1.0) -> bool
func stop_snapshot_blend_cpu() -> void
Blending using the VSBlendCycler node
VSBlendCycler is a ready to use node that does everything automatically: add it to a mesh that has a VSRuntime, and it keeps blending through that mesh’s variations. It is also an example for how to control the runtime, since everything it does goes through the public API documented above.
Setup:
The mesh must have a
VSRuntimenode and at least one variation (see Setup above).Select the
MeshInstance3D, clickAdd Child Node(Ctrl+A) and add aVSBlendCycler.
It reads the VSRuntime and variations from the mesh automatically.
Note
You can also add it under the VSRuntime node itself.
See The VSBlendCycler node for the full description of the node’s properties and how to control it from code.
Sample code and sample scene
Blending is available in the Game scene and the Game.gd script. Just run it to see it in action!