Runtime and API
Note
This feature requires Vertex Studio Pro ⭐.
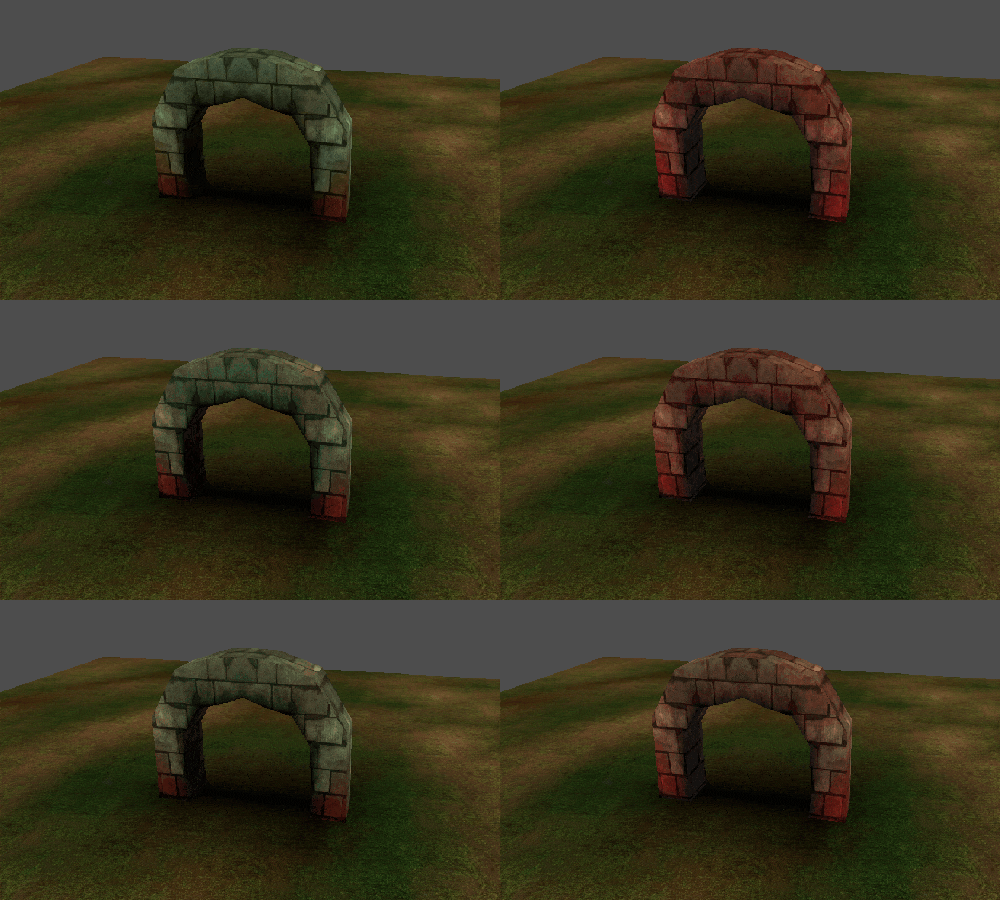
VSRuntime is a node that you add as a child of a MeshInstance3D to switch its Variations from the Inspector and from code while the game is running, without overwriting the base mesh. It can also blend (tween) between variations over time, in-game.
Adding the runtime node
In the Runtime section of the panel, check Add runtime node. A VSRuntime child is added to the selected MeshInstance3D.
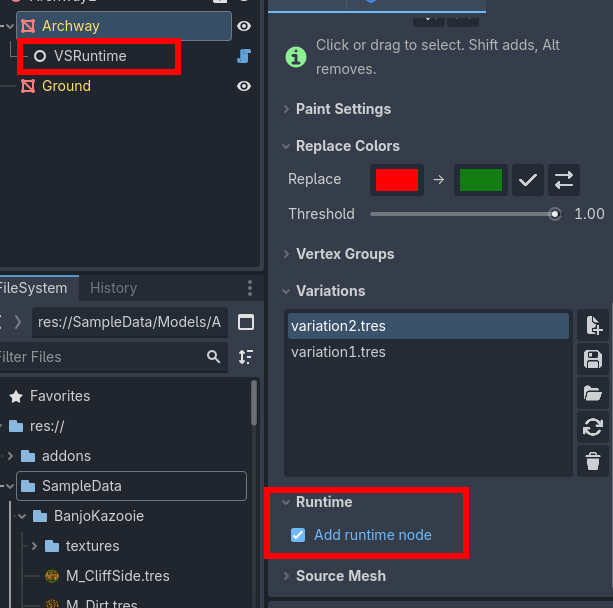
Unchecking the box removes the node and restores the mesh to its baseline.
Note
If the mesh is inside an instanced scene, enable Editable Children on the instance to see and select the VSRuntime node in the Scene Tree.
The Inspector
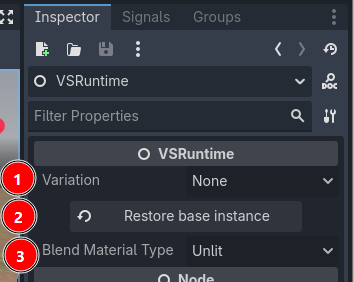
Variation: the variation to apply, listed from the mesh’s variation history. SelectingNonerestores the baseline mesh, which is the state the instance had before a variation was applied to it.Restore base instance: reloads the mesh and the vertex groups from the scene file that owns this instance, dropping the local mesh override. Use it when you painted a world instance directly and want it linked back to the base scene, as if it had never been touched. See more in the Base mesh and world instances section of the quickstart tutorial.Blend Material Type: which of Vertex Studio’s blend shaders (UnlitorLit) is used while blending on the GPU. It has no effect outside of GPU blending.
Note
Restore base instance cannot work on a duplicated child of an instance with Editable Children, because in that case the link to the base instance is already lost.
Switching variations from code
Two ways, both instant (no blending):
# By resource path
runtime.set_active_snapshot("res://Variations/arch-greenish.tres")

# Or by index, the same order as the Inspector's Variation dropdown
runtime.variation = 2
Blending between variations
VSRuntime can also interpolate a mesh from one variation to another over a duration, on the GPU (faster, uses Vertex Studio’s blend shaders) or on the CPU (slower, keeps your own custom shader).
Warning
Blending can have performance implications. Switching variations instantly, as shown above, is fast and production ready.
The full walkthrough, with a sample project, is in the Blending and changing variations in-game/at runtime tutorial.
The VSBlendCycler node
If all you want is a mesh that keeps blending through its variations, add a VSBlendCycler node to a MeshInstance3D that has a VSRuntime and press play: it finds the runtime next to it, reads the mesh’s variations, and cycles through them (or ping-pongs between two), on the GPU or on the CPU, with the durations you set in the Inspector.
Tip
The node is also an example of controlling VSRuntime from your own scripts: everything it does uses the VSRuntime API reference. Source code in addons/vertex_studio/core/vs_blend_cycler.gd.
VSBlendCycler properties
Runtime: theVSRuntimeto drive. Leave it empty to use the one next to the node.Mode:Cycle All: walk every variation of the mesh in order, looping.Ping Pong: bounce between two variations, chosen in thePing Ponggroup below (leave the two empty to make it use the mesh’s first two variations).
Blend Duration: time in seconds.Hold Time: time in seconds to rest on a variation before blending onward.Include Baseline: include the base mesh (None) as a step of the cycle.Play On Start: start blending automatically when the scene runs (when off, it needs to be started from code).Blend Engine:GPUorCPU, the two engines described above.GPUis much cheaper per frame but renders the mesh with Vertex Studio’s blend shader while the blend runs (UnlitorLit, per theVSRuntimenode’sBlend Material Type);CPUkeeps the mesh’s own material.Verbose: print every transition, to see what the cycle is doing.
Driving VSBlendCycler from code
@onready var cycler: VSBlendCycler = get_node("Archway/VSBlendCycler")

func _ready() -> void:
    # Start the cycle (when Play On Start is unchecked)
    cycler.start_blending()

    # Stop it
    cycler.stop_blending()

    # Blend to one specific variation and stay there ("" is the baseline)
    cycler.blend_to("res://Variations/arch-greenish.tres")
start_blending() re-reads the variation list every time it is called (it’s also how you restart the cycle).
API reference
Public API of the VSRuntime node. Variations are called snapshots in the code, and an empty string "" as a path means “None”, the instance baseline.
# Emitted when a blend started with tween_snapshots() / tween_to_snapshot() ends
signal snapshot_blend_finished(to_path: String)

# Variation index, the same as the Inspector's Variation dropdown
var variation: int

# Switching
func set_active_snapshot(path: String) -> void
func get_active_snapshot() -> String
func get_snapshots_file_paths() -> PackedStringArray

# Blending on the GPU
func tween_snapshots(from_path: String, to_path: String, duration: float = 1.0) -> bool
func tween_to_snapshot(to_path: String, duration: float = 1.0) -> bool
func stop_snapshot_blend() -> void

# Blending on the CPU (same behaviour, keeps your custom material)
func tween_snapshots_cpu(from_path: String, to_path: String, duration: float = 1.0) -> bool
func tween_to_snapshot_cpu(to_path: String, duration: float = 1.0) -> bool
func stop_snapshot_blend_cpu() -> void
The tween_* functions return false when the two endpoints can’t be resolved or don’t share the same topology, in which case the target variation is applied instantly instead.
Example:
@onready var runtime: VSRuntime = get_node("Rock/VSRuntime")

func _ready() -> void:
    runtime.snapshot_blend_finished.connect(_on_blend_finished)
    runtime.tween_to_snapshot("res://Variations/rock-mossy.tres", 2.0)

func _on_blend_finished(reached_path: String) -> void:
    print("blend finished at: ", reached_path)
Tip
See the Blending and changing variations in-game/at runtime tutorial for examples, sample project and more information.