Brushes and Painting Tools
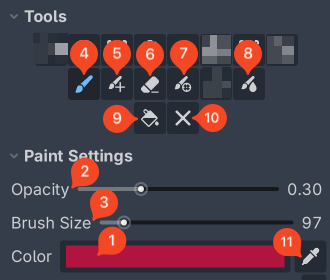
Painting Tools
Paint Brush (B): the default painting tool. Hold the left mouse button and drag in the viewport to paint.
Paint Brush (Additive mode): the same as the Paint Brush, but in additive blending mode.
Eraser (Shift+E): remove color (also affected by the opacity setting).
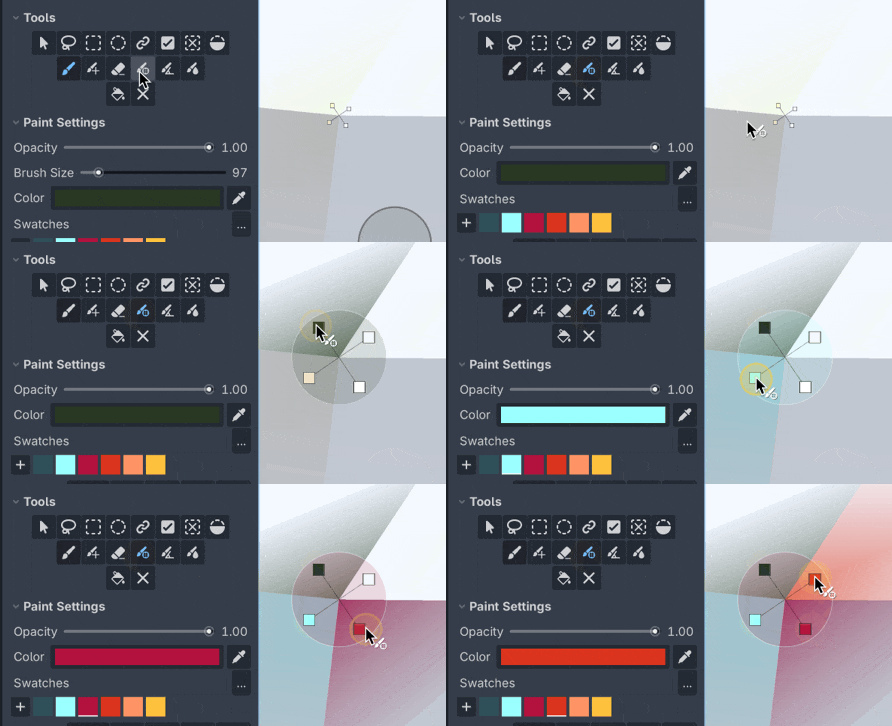
Precision Paint Brush: a point-and-click tool with no brush size that locks onto the exact vertex/point under the cursor, where you can add the color of a single vertex under the cursor to the current active color with the current opacity. If opacity is 100%, the vertex color will be fully replaced by the current active color.
Useful when there are big clumps of vertices nearby where you want precision, and especially useful when painting individual vertices in Split Shared Vertices mode, with the Precision Paint Brush you can pick individual vertices of the clump fan:
Blur Brush: a smoothing brush that nudges each vertex’s color under the brush radius toward the average of its 1-ring neighbours (crossing hard-edge seams too), creating soft gradients.
Fill All / Fill Selection (G): fill every vertex or just the active selection.
Fill also respects opacity, so filling repeatedly builds the color up.
Erase All / Erase from Selection
Erase All does not respect opacity, it will completely remove the color of the all vertices or all vertices in the active selection.
Color Picker: pick the color of the vertex under the cursor.
Falloff Curves
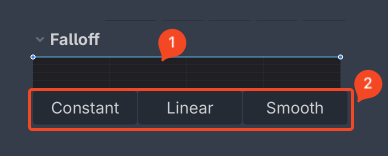
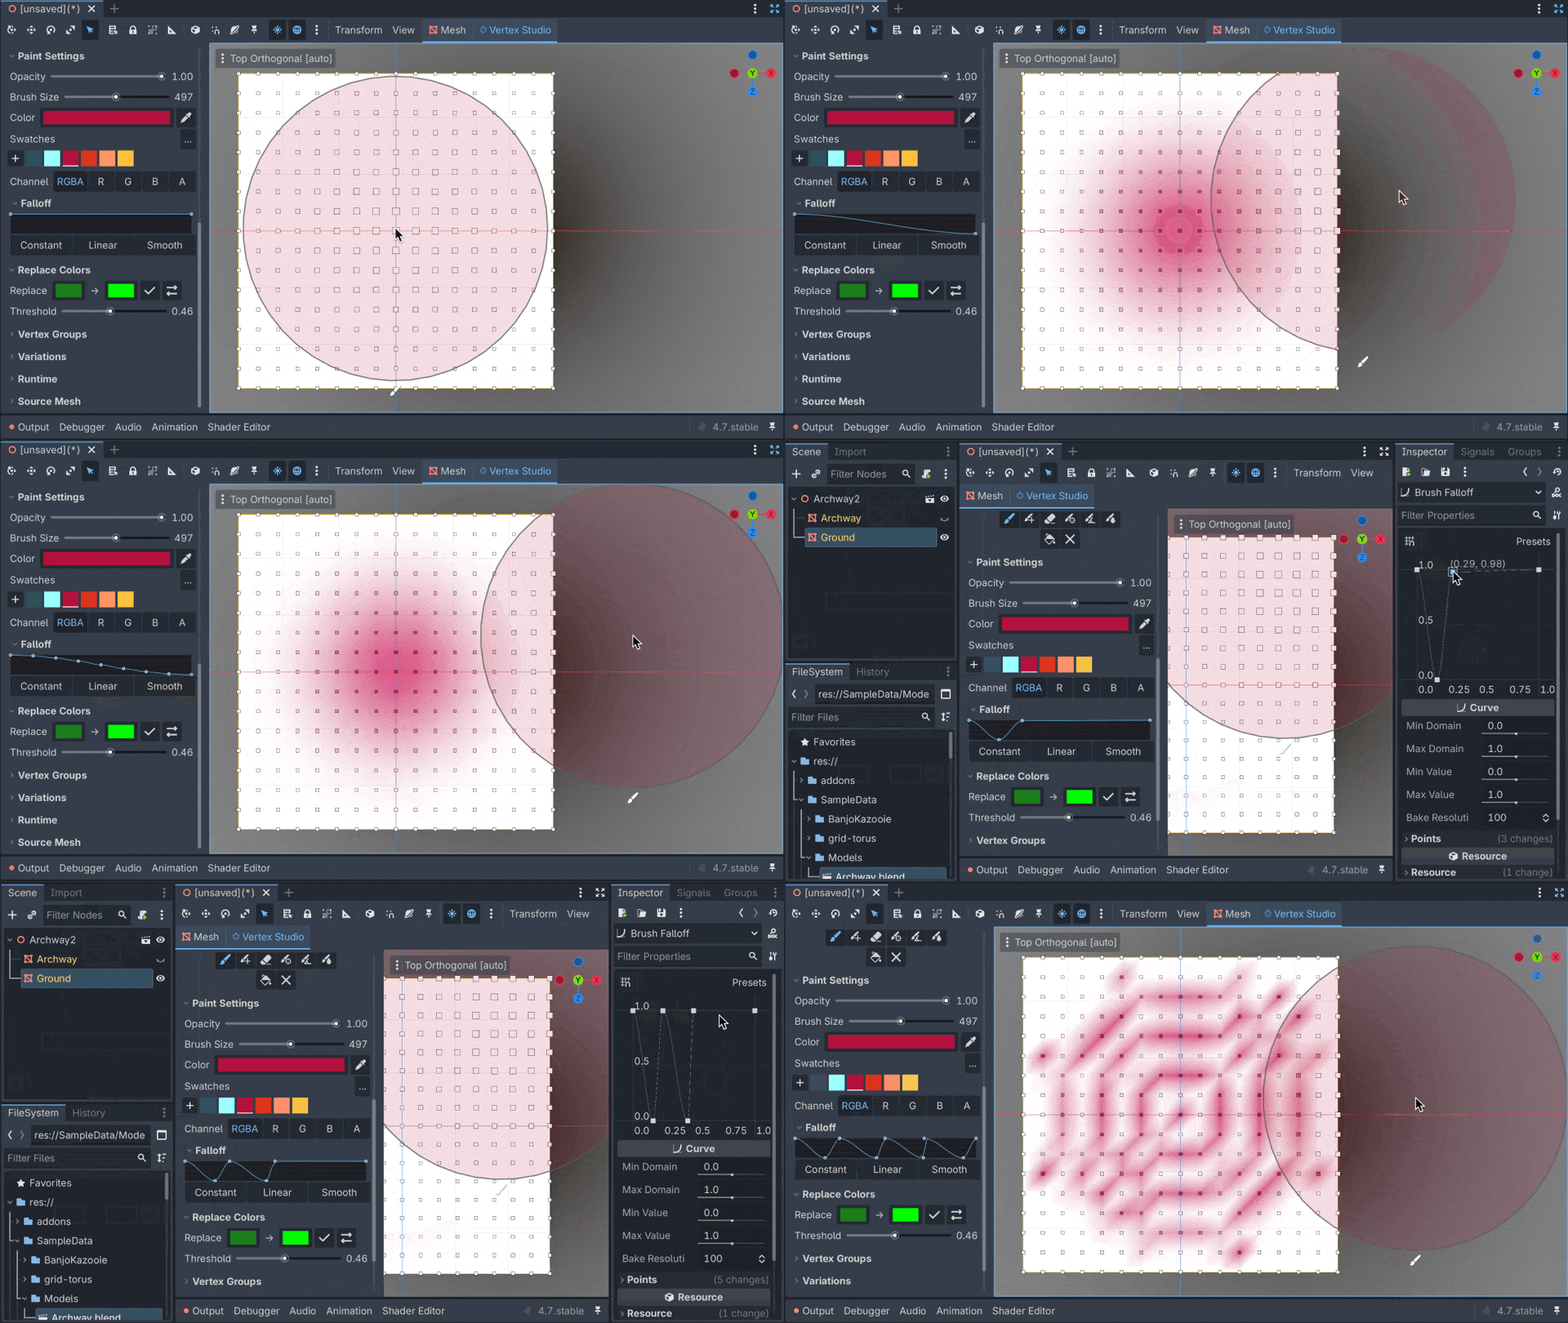
Falloff Curves: shape the brush’s strength profile with Godot’s curves. Different falloff graphs effectively become different brushes and “stamps”.
Custom falloff curve: click to open Godot’s curve editor in the inspector and create a new curve or adjust an existing one.
Default falloff presets:
Constant
Linear
Smooth
Paint Normals
Note
This feature requires Vertex Studio Pro ⭐.
Paint Normals is a brush that edits vertex normals instead of colors, so you can make edges hard or smooth directly in Godot, without going back to Blender.
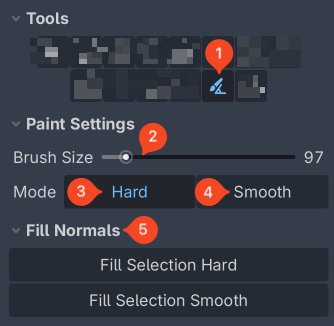
With the tool active, Paint Settings shows a Mode row:
Hard: the brushed corners become faceted, each face keeps its own normal.Smooth: the brushed corners are averaged, so the edge shades smoothly.
Brush size still applies, opacity and falloff do not: a normal is either hard or smooth, there is nothing in between.
While the tool is active, the vertex squares are colored by their current state instead of their color:
Light red for hard.
Light blue for smooth.
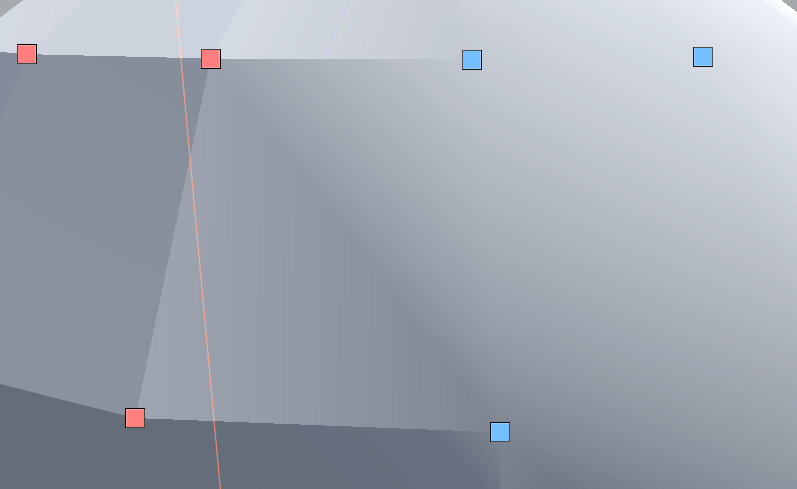
Important
Painting normals is topological, it changes the mesh: making an edge hard splits the corner into one vertex per face, and making it smooth welds those vertices back into one. Tangents are regenerated afterwards.
Since a welded vertex can only hold one color and one UV, corners painted with different colors don’t fully weld: they keep their separate vertices but shade smoothly.
Important
Painting normals is also highly related to the Merge and Split Shared Vertices view mode.
Fill Normals
With the tool active, the panel also shows a Fill Normals section to set the whole mesh at once:
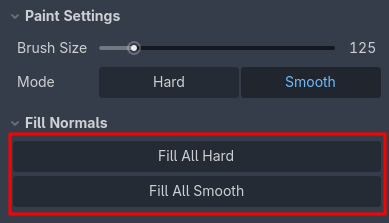
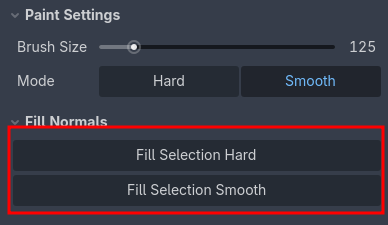
Fill All Hard/Fill All Smooth: apply to every vertex.With an active selection the buttons become
Fill Selection Hard/Fill Selection Smoothand apply only to the selected vertices.
Tip
Use the Setup Lit material while editing normals (see Material Setup). The unlit material shades everything flat, so you won’t see the difference between a hard and a smooth edge.
Tip
Remember that any tool and action can be bound to a key, see Shortcuts.